
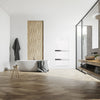
Heating the bathroom with infrared.
, by Eugene Verbraak, 2 min reading time
, by Eugene Verbraak, 2 min reading time
Heating a bathroom with infrared starts with your goal: do you want to keep the whole room warm or add comfort while you use it? Output, position and controls come next. This guide helps you gather the right information and choose a suitable option.
Primary heating must cover heat loss from the whole bathroom. Supplementary heating supports an existing system. A heated mirror can combine functions if its output is suitable. Separate anti-fog film has a different purpose: warming part of the mirror to reduce condensation.
Have the required output calculated. A general floor-area label or the mirror’s size is not enough to size the heating reliably.
An infrared panel needs a clear radiant path. Check its permitted mounting methods and clearances in the manual. Have a professional assess the position, exposure to water, power supply and connection. No single distance or IP rating makes every device suitable for every bathroom position.
Decide where room temperature will be measured and how the system will be switched. Check the thermostat, receiver and mounting materials included in a kit. Supplied kit materials do not automatically include completed installation work.
The warmed mirror surface can reduce mist during use. Ventilation remains necessary to remove moisture. Heating does not replace the treatment of ventilation or damp problems.
Electricity use depends on output and actual on-time. A 1000 W panel running continuously at full power for one hour uses 1 kWh. The thermostat and room conditions determine how long it actually runs. A lower energy bill is not guaranteed in advance.
Keep your room dimensions and intended use handy. We help match output, finish, position and controls. Explore complete infrared kits for other rooms or request advice for your bathroom.


